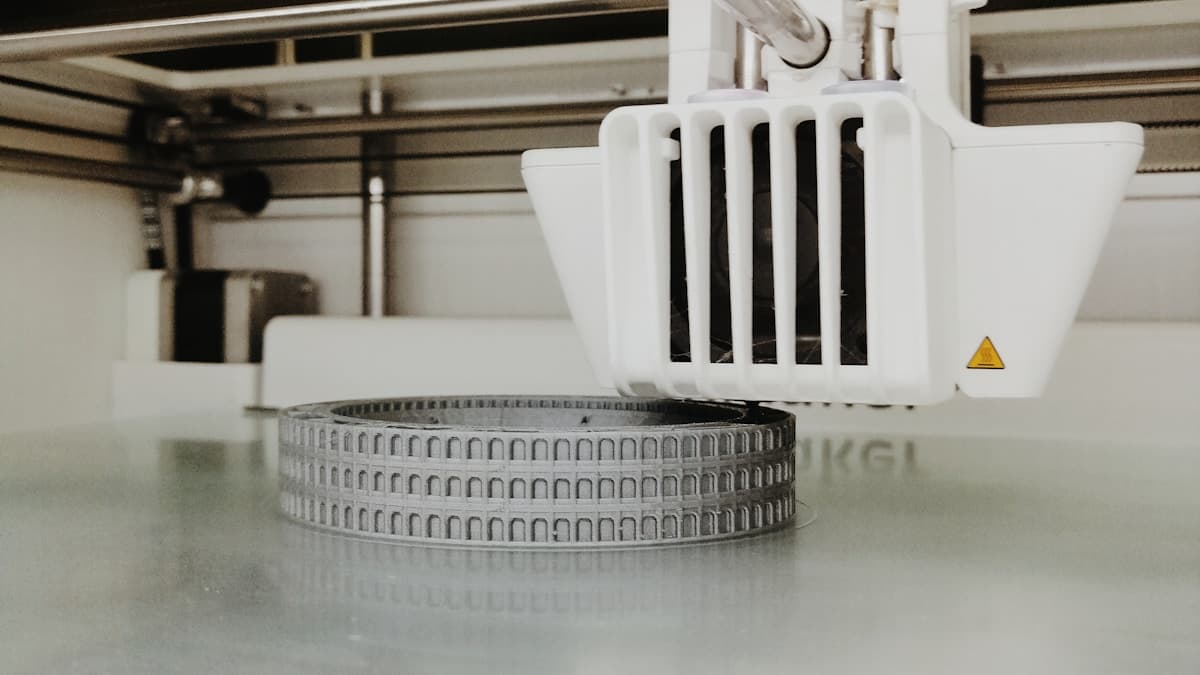
You unboxed the printer, ran the file that came on the card, and it produced a clean little model with crisp layers and no stringing. Then you sliced your own part on the same machine, in the same room, an hour later — and got a lifted corner, a rough first layer and walls you can see through. The test print that came with your printer is not a measurement of what the machine will do for you. It is a recording of somebody else's finished calibration, and almost nothing about it survives contact with your own files.
This post contains affiliate links. If you purchase through these links, 3D Prototyping Hub may earn a small commission at no extra cost to you.
This post also contains Amazon affiliate links. As an Amazon Associate I earn from qualifying purchases.
What That File Actually Is
The demo on the card is gcode, not an STL. That distinction is the whole article.
An STL is a shape, and your slicer has to decide how to build it. Gcode is a finished set of instructions in which every decision has already been made by somebody else: nozzle and bed temperature, extrusion multiplier, retraction length and speed, acceleration, pressure advance, the fan curve, the minimum layer time, the maximum volumetric flow. The manufacturer sliced it on a machine identical to yours, with filament from their own factory, and iterated until it looked good on camera.
It is a known-good combination of three things — machine, material, profile. You kept the machine and replaced the other two.
| What the demo file controls |
What changes the moment you slice your own part |
| A profile tuned on this exact model |
A generic vendor profile shipped with your slicer |
| Filament from the factory that tuned it |
A different brand, with a different temperature window |
| A spool sealed weeks ago |
A spool that has been open on your shelf |
| A model chosen to be printable |
A part designed for its job, not for the printer |
| 30–60 minutes of runtime |
Six to fourteen hours of everything that can drift |
The Five-Minute Test That Tells You Which Half Is Broken
Before you change a setting or buy anything: slice the manufacturer's own demo model with your profile and your filament, and print that.
Most vendors ship the STL alongside the gcode, and if yours didn't, the same model is almost always on their download page. The result splits three causes that otherwise look identical:
- Their gcode prints, your slice of their model fails. The hardware is fine. The fault is in your profile or your filament — sections 2 and 3 below.
- Their gcode prints, your slice of their model prints, your own part fails. The machine and the profile are both fine, and you have a geometry problem: overhang angles, footprint, height, orientation.
- Both fail. It is the machine, the plate or a blocked nozzle, and no amount of profile tuning will reach it.
That single print is worth more than a week of forum advice, because every suggestion you will be given assumes an answer to this question that nobody has actually checked.
1. The Demo Model Was Chosen So It Cannot Fail
Look at what the sample print is, across every brand: a small, squat, solid-ish object with a modest footprint, sitting in the middle of the plate. A boat. A cat. A faceted vase. A ring of arches.
That is not an accident, and the constraints it respects are the ones your own part breaks:
- Footprint in the centre of the bed, where the plate is flattest and the mesh from auto-levelling is densest. Your 180mm bracket spans the corners, where the bed is not flat and the probe interpolates — the limits of which are in why auto bed levelling doesn't fix your first layer.
- Low height. A 40mm model finishes before the gantry has heat-soaked and before anything in the room changes.
- No steep overhangs, no long bridges. Demo geometry is either self-supporting or gently curved. A flat 10° overhang on your part is a different machine entirely, as in why 3D print overhangs sag.
- Features much larger than the nozzle. Nothing in the demo is a 0.8mm wall or a 1.5mm pin, so nothing in it depends on flow being exactly right.
- Short runtime. Forty minutes of adhesion is an easier ask than fourteen hours of it.
Scale is doing quiet work here too — the forces that a demo never generates are the ones covered in why 3D printed parts fail when you scale them up.
2. Their Gcode Carries Tuning Your Profile Doesn't Have
The profile that sliced the demo is not the profile you were given. Vendors ship a conservative generic preset to the slicer community and keep a hand-tuned internal one for their own files — and even when they are nominally the same, yours is filled in for an average machine rather than measured on this one.
Four numbers account for most of the difference, and you can fix them in an evening:
- Flow (extrusion multiplier). Print a single-wall cube and measure the wall with a pair of digital calipers. If the slicer planned a 0.42mm line and you measure 0.36mm, nothing downstream of that is trustworthy. This is the same under-delivery described in why 3D prints under-extrude, arriving before you ever suspected it.
- Pressure advance or linear advance. It controls melt-zone pressure through corners and at line starts. Untuned, you get bulged corners and starved beginnings; the demo had it set.
- Temperature, on your spool. Run a tower with the filament you actually own, not the one the profile was written for.
- Retraction. The wisps in a bad print are usually two numbers, not a hardware fault.
If your machine supports input shaping but shipped without a measured profile, an ADXL345 accelerometer fills in the one set of values you cannot estimate by eye. What it will not do is rescue an untuned flow number, which is why it comes fourth and not first.
This is also why the same STL behaves differently on two machines that are supposedly identical — the mechanism is laid out in why the same file prints differently on two printers.
3. The Sample Spool Is Dry and Yours Probably Isn't
The coil that came in the box is 100–250g of the manufacturer's own PLA, sealed recently, matched to the profile that sliced the demo. It is the single most favourable spool you will ever load.
Yours is a different brand — which moves the usable temperature window by 10–20°C on its own — and it has been open since you bought it. Moisture in the filament turns to steam in the melt zone, which makes flow erratic, roughens walls, drives stringing and weakens the bond between layers. The symptoms read as a badly tuned machine and they are not. What drying can and cannot repair is in why drying filament doesn't fix your prints, and the brand-swap effect in why a new spool of filament prints worse.
Three things worth doing in order:
- Diagnose on a reference spool. Calibrating a profile against a questionable spool means solving for two unknowns at once. Overture's High Speed PLA is an ordinary, predictable 1.75mm PLA — the point is not that it is special, it is that its behaviour stops being one of your variables.
- Dry while printing, not before. A long job keeps absorbing moisture from the room while it runs, so a heated dryer that feeds the printer during the job is the version that holds for a fourteen-hour part.
- Store the rest properly. Rechargeable indicating desiccant costs less than a second dryer, and the colour change tells you when the box has quietly stopped working.
4. The First Layer Was Set Up Once, at the Factory, on a Clean Plate
Final QC set the Z-offset on a plate nobody had touched, in a temperature-controlled room, and then the machine was boxed.
Since then the plate has collected fingerprints — skin oils are a release agent — and in many cases it still carries manufacturing residue from the factory that made it. Clean it with 99% isopropyl alcohol before you believe anything a first layer tells you. This is free, takes a minute, and gets skipped constantly because it sounds too simple to be the answer; the rest of the adhesion picture is in why 3D prints don't stick to the bed.
Only when cleaning has failed twice is the surface itself the problem. A tired or heavily coated sheet holds a 30g demo perfectly well and lets go of a large flat footprint six hours in, which is exactly the failure the sample print can never expose — at that point a fresh PEI sheet is a real fix rather than a shot in the dark.
5. Forty Minutes Versus Fourteen Hours
The last difference is simply exposure. Most of what goes wrong on a desktop printer is a slow drift, and a short print finishes before the drift arrives.
In a long job the gantry heat-soaks and its geometry shifts slightly; the room cools overnight and changes how the part cools; an open spool takes on more moisture hour by hour; the part gets taller, so any warp has a longer lever on the adhesion holding it down; and the odds of one skipped step or one blob catching the nozzle accumulate with every layer. None of this is a defect. It is just time, and the demo file was built not to spend any.
The practical response is to stop judging changes on short prints. If a part fails at hour nine, a successful twenty-minute calibration cube is not evidence that you fixed it.
When It Really Is the Machine
Go back to the re-slice test. If your slice of the manufacturer's own model also fails, no profile work will save it, and the order is cheapest first:
- Clean the plate properly, then re-check the Z-offset by eye on a first-layer patch.
- Check for a partial clog. A cheap or wet first spool leaves deposits that survive every setting change you make and mimic a tuning fault exactly — cleaning filament and a cold pull rule it out in fifteen minutes. If you are also due a nozzle change, the sizing trade-offs are in 3D printer nozzles explained.
- Check belts, wheels and full-travel binding before buying anything at all.
What not to do is start bolting parts on. A machine that cannot repeat a known-good file has something wrong with it that an upgrade will inherit — the general case is in why 3D printer upgrades don't fix print quality.
If the honest conclusion is that the printer cannot hold a calibration from one day to the next, the thing to compare across machines is not headline speed. It is whether the printer can measure its own flow and pressure advance, whether the manufacturer maintains profiles for the slicer you actually use, and whether the chamber holds temperature instead of your room doing it. ELEGOO's current printer range, Anycubic's current printer range and QIDI's current printer range are the three worth lining up on those three criteria.
If You Needed the Part, Not the Hobby
There is a version of this where the calibration evening is the point, and a version where you have a deadline and a machine that will not cooperate. They are different problems and only one of them is solved by tuning.
If the part has to exist this week, in a material you have not printed before, or to a tolerance you cannot verify, the shops in our provider directory quote on exactly that work and their calibration is somebody else's evening. What 3D printing actually costs sets a quoted part against a stack of failed prints, which is usually the honest comparison.
Otherwise: reprint the demo as your control, re-slice its model to find out which half is broken, and fix flow before you fix anything else. The machine was never doing something for the manufacturer that it will not do for you — it was simply given better instructions.
Hero photograph by Andrea G on Unsplash.