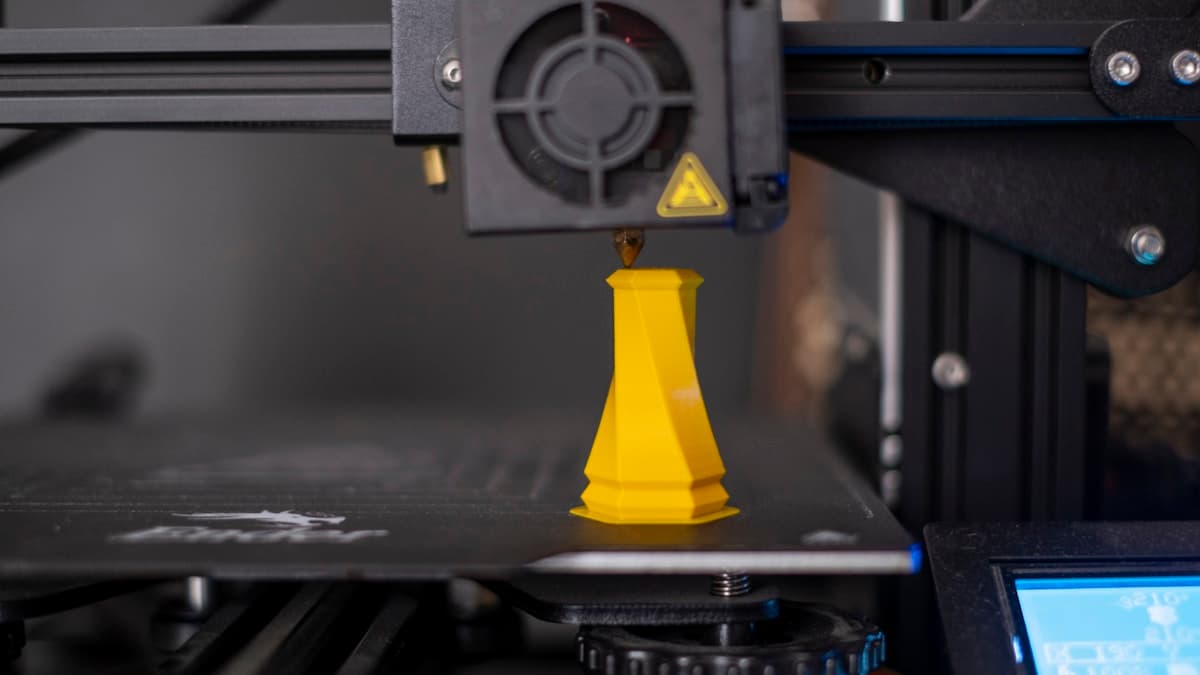
Three sides of the vase are perfect and the fourth has a zip running up it. Every layer put its blob in the same place, and now there is a line you can feel with a fingernail from the plate to the rim. A visible seam on a 3D print is not a defect in the ordinary sense — it is the unavoidable consequence of building a part from closed loops of plastic, and no setting removes it. What you get to decide is how big it is, where it lands, and whether it stacks into a stripe or disappears into an edge. Where the surface is the product and a nozzle is the wrong tool for it, the provider directory is the shorter route.
This post contains affiliate links. If you purchase through these links, 3D Prototyping Hub may earn a small commission at no extra cost to you.
This post also contains Amazon affiliate links. As an Amazon Associate we earn from qualifying purchases.
Read the Seam Before You Change a Setting
Six patterns cover almost every complaint about seams, and they do not share a fix. Hold the part under a raking light — a desk lamp low and to one side — rather than overhead, which flattens exactly the feature you are trying to judge.
| What you see |
What it actually is |
Where to start |
| A raised ridge or row of blobs up one side |
Melt pressure not relieved at each stop |
Pressure advance, then retraction |
| Pinholes or notches up one side |
Over-retraction; the loop restarts starved |
Less retraction, enable wipe |
| A dead-straight zip up a flat face |
Seam aligned, landing at the same XY every layer |
Move it to a corner, or paint it |
| Specks scattered over the whole wall |
Seam set to random |
Stop randomising; hide it instead |
| A spiral winding around the part |
"Nearest" seam following the travel path |
Choose an explicit seam position |
| A seam only obvious on shiny filament |
Specular highlight, not geometry |
Matte filament, or finish the part |
The last row is the one people skip. A good proportion of "my seam is terrible" is a 0.05mm ridge catching the light, and it measures the same on a matte roll where nobody would have noticed it.
Every Perimeter Has to Start Somewhere
A layer is a closed loop. The nozzle drops into position, lays plastic all the way round, and arrives back where it began — at which point it has to stop, lift and move on. Both ends of that loop are a problem.
At the stop, there is still pressure in the melt. Molten plastic in the nozzle behaves like a compressed spring: the extruder has been pushing against the resistance of the orifice, and when the motion ends that stored pressure keeps pushing material out. The surplus lands at the stop point.
At the start, the opposite happens. After a retraction the melt has to be recompressed before plastic comes out at the commanded rate, so the first few millimetres of the loop are thin. Push the retraction too far and you get a notch instead of a blob.
Stack either across two hundred layers and you have a line. This is also why Bowden machines have a harder time than direct-drive ones — a longer column of filament between the drive gear and the nozzle is a longer spring, so the lag at both ends is bigger. It is the same mechanism behind blobs and zits elsewhere on the surface; the seam is simply where it happens on every single layer instead of occasionally.
Calibrate Pressure Advance Before Anything Cosmetic
Pressure advance — linear advance on Marlin, flow dynamics on some stock firmware — ramps extrusion down before the end of a move and up before the start, so the pressure in the melt tracks what the nozzle is actually doing. It is the single setting that attacks the cause rather than the symptom, and it is the one most people never touch.
Run your slicer's own calibration pattern rather than a number from a forum. The correct value depends on the extruder, the hotend, the material and the temperature, and it changes when any of those change. Two things worth knowing before you start:
- It fixes bulging corners at the same time. If your square parts are fat at the corners as well as seamed, that is one fault, not two.
- It is per-material. PETG and TPU hold pressure differently from PLA. Calibrate on the filament you actually print.
Only then touch retraction, and change one thing at a time:
- Retraction distance. Direct-drive extruders need a fraction of what a Bowden setup needs — start from your profile's default rather than inventing a number, and move in small steps. Too much is as visible as too little; it just looks like a hole instead of a bump.
- Wipe. Moving the nozzle back along the line already printed before lifting leaves the surplus inside the loop rather than on the outside of it. Cheap and effective.
- Coasting. Cutting extrusion slightly before the end of the loop. It works, and it under-fills the seam if you are heavy-handed, so treat it as a last adjustment rather than a first one.
- Seam gap. Most slicers expose a small deliberate gap at the closing point. Opening it hides a blob; opening it too far creates a visible notch.
Where the Seam Lands Is a Decision
Your slicer offers several placement strategies, and the default is usually not the right one for the model in front of you.
Aligned stacks every start point at the same XY coordinate. On a part with a corner or an edge this is what you want, because the line falls in a place the eye already reads as a line. On a smooth cylinder it is the worst option available, because it manufactures a feature on a surface that has none.
Sharpest corner lets the slicer find a real edge on each layer and hide the join there. On faceted or boxy models — the sort of tapered, flat-sided part in the photo at the top of this page — this is the setting to use and it is close to free.
Random moves the start point every layer. It converts one line into dots across the whole wall. That is right on textured, organic or patterned surfaces and wrong on anything smooth.
Painted or user-specified is the best answer for display pieces: you mark the vertical band where you want every seam to go, and put it on the back, inside a groove, or under an arm. A minute in the slicer beats twenty with sandpaper.
Scarf seam, in recent slicer versions, ramps the overlap along the perimeter rather than butting the ends together. It spreads the join over a few millimetres so nothing piles up at a point. On curved display models it is the biggest improvement available in software. It costs a little print time and it does not help on loops too small to ramp across.
Design the Seam Out
The most reliable fix happens in CAD, before the slicer sees the model.
- Give the part a corner where you want the seam. A shallow vertical groove or a 0.5mm chamfered rib gives "sharpest corner" something to lock onto, and reads as a design feature rather than a fault.
- Orient the model so the seam faces away. The back of a bust, the wall side of a planter, the underside of a bracket.
- Split larger models at an edge and join afterwards, so the seam lands on a line the design already has.
- Use vase mode for single-wall decorative prints. One continuous spiral has no per-layer start at all — which is the only genuine way to not have a seam.
- Keep the seam off lettering. A seam crossing raised text turns crisp characters into mush, which compounds the problems covered in why 3D printed text and logos come out mushy.
Material Decides How Visible the Same Seam Is
Identical geometry, identical machine, different roll: the seam measures the same and reads completely differently.
Silk and high-gloss filaments are the worst offenders, because a raised ridge on a mirror-like surface catches a highlight along its entire length — one of the trade-offs in our silk PLA guide. Matte PLA does the opposite, scattering the highlight so the same ridge disappears at arm's length. Mid-grey and white are the hardest colours to hide a seam in; dark matte colours are the most forgiving.
PETG is a special case. It oozes more than PLA at the same nozzle temperature and strings more readily, so its seams blob where PLA's would not — the retraction and temperature work in why 3D prints are stringy is the same job. And a worn or dirty nozzle makes every stop worse: a scored tip or a skirt of baked-on plastic drags material at exactly the moment the nozzle is trying to leave cleanly. A fresh 0.4mm nozzle is a legitimate diagnostic step, and if anything abrasive has been through the machine — carbon-fibre, glitter, glow-in-the-dark — a hardened steel nozzle is what holds its bore. The sizing trade-offs are in our nozzle guide.
What the Hardware Genuinely Changes
Technique fixes most seams. Where it does not, these are the specifications that matter, stated from what manufacturers publish rather than from a shootout we did not run:
- Firmware that exposes pressure advance, with a calibration routine built in. This is the specification most directly tied to seam size and it is almost never in the headline list.
- Direct drive rather than Bowden. A shorter melt column means less stored pressure to dump at every stop.
- Motion-system stiffness. A frame that rings on direction changes puts its artefacts near corners, which is where you have just asked the slicer to hide the seam — see ringing and ghosting.
- Extruder consistency. A dual-drive geared extruder holds flow rate better at the low extrusion rates that occur at the start of a perimeter.
ELEGOO's US store and Anycubic's store both list hotends, nozzles and extruder assemblies beside the machines, which is where the part number for your specific model is unambiguous. QIDI's enclosed machines run Klipper, which exposes pressure advance as a tunable parameter with its own calibration macro — relevant here because that is the setting this whole article turns on. Flashforge's printer range is the other enclosed option worth reading specifications on if ABS and ASA are in your future.
Finishing the Seam You Could Not Print Away
Some parts get a seam regardless, and the fix is thirty seconds with a tool rather than another test print.
A rotary deburring blade shaves a proud seam off in one pass without flattening the surface either side, which is exactly what sandpaper does. For functional parts this is usually the whole job. In grooves, corners and around lettering, sanding sticks and needle files keep the surrounding surface flat while you work the one line.
For display pieces, go further: wet-sand from 400 grit upward, keeping the paper wet and moving, then filler primer, inspect under raking light, spot-sand what the primer revealed, and prime again. Bare paint over a sanded seam shows it off; filled primer is what actually hides it.
When to Stop Chasing It
Three situations where another profile tweak is the wrong next step.
The surface is the product. Show models, masters for moulding and anything that will be photographed are judged on finish, and a nozzle-built part has a seam by construction.
The process is wrong for the job. SLA and powder-bed parts have no seam at all — nothing in those processes starts and stops a perimeter. If finish is the deciding requirement, that is a process change rather than a settings change, and the comparison is in SLA vs FDM.
It is a batch, not a part. Deburring one seam is half a minute. Deburring two hundred is a shift, and a bureau prices that as a finishing operation rather than a weekend.
For everything else, work the order: look at it under raking light, calibrate pressure advance, then retraction and wipe, then move the seam to a corner or paint it, then change the filament's finish — and leave sandpaper until last. Most "my printer makes an ugly seam" problems are one of those five. When they are not, the providers in our directory run FDM, resin and powder-bed side by side and will quote the process the part actually needs.
Hero photo by Osman Talha Dikyar via Unsplash.