The slicer says 14 hours for a phone stand. You raise the speed from 60mm/s to 150mm/s, re-slice, and it says 11 hours 40. That result is not a bug and it is not your machine being tired — it is the arithmetic of extrusion, and it is the reason 3D prints take so long even on a printer sold on its speed. Print time is the volume of plastic in the part divided by how fast the hotend can melt and place it, plus a fixed overhead of accelerating, decelerating and waiting for layers to cool. The speed slider only touches one of those, and usually gets overruled. This guide goes through what actually moves the number, in the order of how much time each change is worth.
This post contains affiliate links. If you purchase through these links, 3D Prototyping Hub may earn a small commission at no extra cost to you.
This post also contains Amazon affiliate links. As an Amazon Associate we earn from qualifying purchases.
The One Number That Sets the Ceiling
Everything below follows from a single figure: volumetric flow rate, in cubic millimetres per second. It is what the hotend can melt, and the melt zone does not care how you arrived at the demand.
flow (mm³/s) = print speed (mm/s) × layer height (mm) × line width (mm)
A stock single-fan hotend on a mid-range machine supplies roughly 8–15mm³/s on PLA, less on PETG, and less again on anything filled. A high-flow hotend on a current machine sits nearer 20–30mm³/s. Put your own numbers in:
| Profile |
Speed |
Layer |
Width |
Demand |
| Cautious 0.4mm |
60mm/s |
0.2mm |
0.42mm |
~5mm³/s |
| Typical 0.4mm |
100mm/s |
0.2mm |
0.45mm |
~9mm³/s |
| "Fast" 0.4mm |
200mm/s |
0.2mm |
0.45mm |
~18mm³/s |
| 0.6mm nozzle, thick layers |
120mm/s |
0.3mm |
0.65mm |
~23mm³/s |
Ask for more than the hotend can supply and one of two things happens. The slicer's maximum volumetric speed setting clamps the move, so the printer silently ignores the speed you typed — which is exactly why re-slicing at 150mm/s changed so little. Or there is no clamp set, and the extruder grinds and skips instead, which shows up as the thin walls and gappy tops described in our under-extrusion checklist.
So the honest way to read a print time is: this part contains this many cubic millimetres, and my machine can place this many per second. Set that expectation and the rest of the tuning is about not wasting the capacity you have.
Nozzle Diameter and Layer Height Beat Speed
Look at the equation again. Speed is one of three multipliers, and it is the one the hardware fights. The other two are free.
Layer height is a direct division. The same part at 0.3mm instead of 0.2mm has a third fewer layers, and each layer costs a fixed amount of acceleration and travel regardless of how much plastic is in it. On most functional parts that alone is a quarter to a third off the clock.
Nozzle diameter raises the line width, and the width sets both how much plastic each pass carries and how many passes a wall needs. A 0.6mm nozzle deposits about 1.5 times the plastic per pass as a 0.4mm at identical speed, and it lets you run taller layers without the layer height exceeding a safe fraction of the orifice.
| Setup |
Typical layer range |
Relative time on a functional part |
Best for |
| 0.4mm nozzle |
0.12–0.24mm |
Baseline |
Detail, small mechanisms, miniatures |
| 0.6mm nozzle |
0.2–0.36mm |
~50–65% of baseline |
Brackets, jigs, enclosures, most prototypes |
| 0.8mm nozzle |
0.3–0.5mm |
~35–50% of baseline |
Large shells, vases, cosplay, moulds |
A set of 0.6mm and 0.8mm brass nozzles costs a few dollars and is the highest-value change on this page. Two cautions. Change the nozzle diameter in the slicer profile as well as on the machine, or every dimension will be wrong. And if you print carbon-fibre or glass-filled grades, use hardened steel — a big nozzle run hot wears faster, and a worn orifice quietly changes the numbers you just calibrated. Our guide to nozzle sizes and materials covers which diameter belongs on which job.
Where the Hours Are Actually Going
Before changing anything else, open the slicer's preview and read the time breakdown by feature type. Nearly every slicer will tell you how the estimate splits, and the split is rarely what people assume.
- Perimeters usually dominate. They are printed slower than infill on purpose, for surface quality, and each additional wall adds a full lap of the part on every layer. Three walls instead of five on a non-structural part is a large, safe saving.
- Solid top and bottom layers are printed at 100 percent density. Five top layers at 0.2mm is a millimetre of solid plastic across the whole footprint. Four is usually enough, three on a hidden face.
- Infill matters less than its reputation. Dropping 20 percent to 10 percent saves real time but rarely as much as one wall. Gyroid and grid print faster than cubic or honeycomb at the same density.
- Supports are pure overhead — you print them, then bin them. Re-orienting a part to eliminate supports frequently saves more than every speed setting combined, and it prints better; see why overhangs sag for what actually needs supporting and what does not.
- Travel is free plastic-wise and expensive time-wise on parts with many islands. Reducing travel or enabling the slicer's travel-optimisation option is worth a look on lattices and multi-part plates.
Small Parts, Minimum Layer Time, and the Fix Nobody Uses
If a 12-gram figurine takes 90 minutes, the flow ceiling is not your problem. Minimum layer time is.
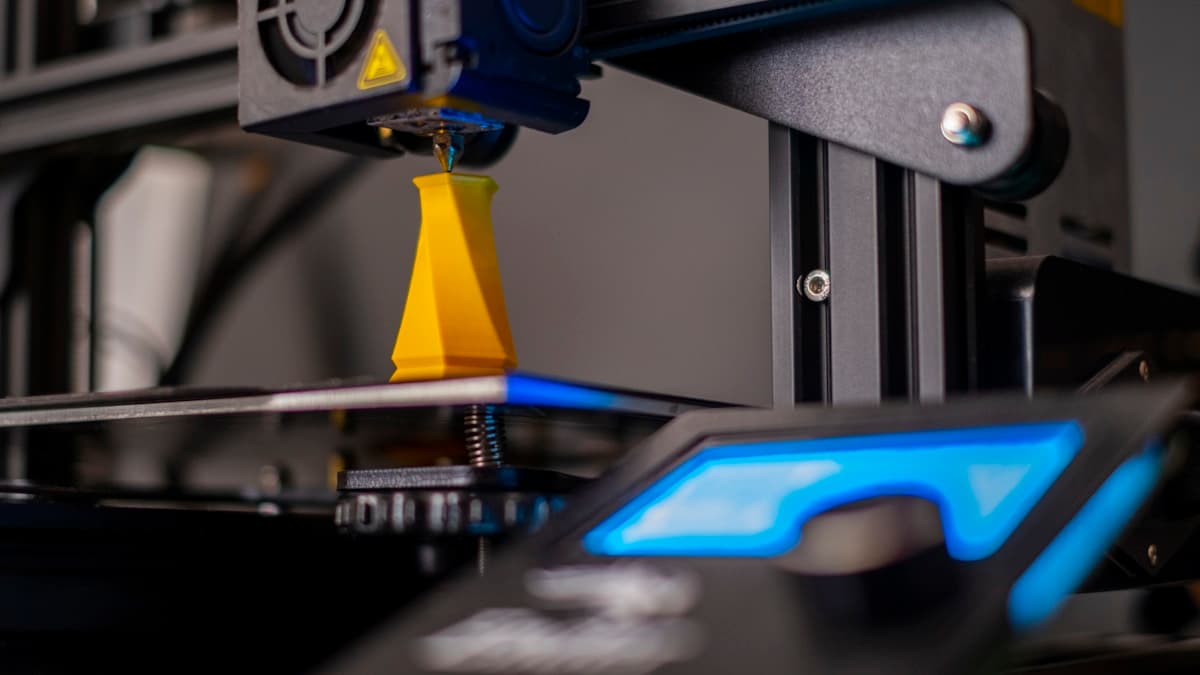
Slicers enforce a floor — commonly five to ten seconds — on how long each layer takes, so the previous layer has time to solidify before the next one lands. A layer with two seconds of real work in it gets stretched to the minimum, either by slowing the head down or by parking it. The tall tapered part in the photograph at the top of this page is the exact case: a small cross-section, hundreds of layers, and most of the clock spent waiting rather than extruding.
Two fixes, in order:
- Print more than one. Put four copies on the plate and each layer now has enough work to reach the minimum on its own. Four parts often take barely more time than one, which is the single most under-used trick in FDM.
- Cool harder so the minimum can come down. More airflow lets the plastic set faster, so the slicer's floor can be lowered without the layers slumping. A stock 4010 fan is frequently the limit; a 5015 blower with a decent duct is a common upgrade for exactly this reason. Note that ABS and ASA want less cooling, so this applies to PLA and PETG.
What Breaks First When You Speed Up
A fast profile that produces parts you throw away has not saved any time. These are the failures that arrive in order as you push, and what each one asks for.
Ringing and rounded corners. Vibration from hard acceleration, echoing behind every edge. Tension the belts first — a plucked belt should give a clean low note, and a proper tensioner holds a setting a thumbscrew will not. Then run your firmware's input shaping or resonance-compensation calibration, which is the feature that genuinely allows higher acceleration rather than merely permitting it. If the whole machine rocks on a flexing desk, damping feet are cheaper than a slower profile.
Layer shift. A belt slipping or a motor skipping under acceleration it cannot deliver. That is a different fault from ringing and has its own checklist in why prints shift mid-print.
Intermittent under-extrusion that only appears when fast. Often spool drag: at high flow the extruder is also hauling the reel around, and a stiff holder is a real load. A holder on bearings removes it. Material matters too — high-speed PLA is formulated to melt and set quickly, and costs the same as the standard grade.
A first layer that lets go. First layers are printed slowly for good reason. Speeding them up to save four minutes on a ten-hour print is the worst trade on the machine — see why prints don't stick to the bed.
When the Machine Genuinely Is the Limit
Some ceilings do not move. A bed-slinger throws the part backwards and forwards, so its usable acceleration is limited by the mass of the plate and whatever is printed on it — a tall part on a bed-slinger is slow in a way no setting fixes. A stock hotend with a short melt zone cannot supply 25mm³/s however good the extruder is. And firmware without input shaping cannot trade acceleration against ringing at all.
At that point the honest answer is hardware. A current CoreXY machine with a high-flow hotend, input shaping and a rigid frame is not a marginal gain over a five-year-old bed-slinger; it is a different category of print time. Flashforge's CoreXY machines and Anycubic's high-speed FDM range both sit in that bracket, and ELEGOO's FDM printers and hotend spares cover both a new machine and a high-flow upgrade to an existing one. Compare specifications on the stated volumetric flow rate and the frame type rather than the headline millimetres per second, which is a number quoted at an acceleration nobody prints at — our round-up of high-speed 3D printers does that comparison, and printers under $2,000 covers the tier where high-flow hotends became standard.
The Order to Work Through
- Read the slicer's time breakdown by feature. Fix whichever bar is longest, not whichever setting is most familiar.
- Re-orient the part to delete supports and shorten the Z height.
- Raise layer height to 0.28–0.3mm on anything that does not need fine detail.
- Fit a 0.6mm nozzle and update the profile to match.
- Cut walls and solid layers to what the part structurally needs.
- Batch small parts so minimum layer time stops setting the clock.
- Then raise speed and acceleration, and only as far as belts, cooling and input shaping allow.
- Buy hardware last, and only against a measured flow ceiling.
When the Right Answer Is Not Your Printer
There is a point where the arithmetic stops favouring the machine on the desk. A large enclosure at 0.2mm layers is a 40-hour job on a desktop printer and a supervised one — a failure at hour 32 costs the whole run, not the remaining eight. Print farms and service bureaus run larger nozzles, heated chambers and industrial hardware precisely because their economics are measured in machine-hours.
If the part is big, urgent, in an engineering material, or simply one of many, get a quote before you commit a week of evenings. Browse providers by location and process, send the same STL or STEP file to two or three, and compare the price against the hours and the risk of a failed print. For a one-off, the quote is often less than the filament you were about to scrap.
Hero photograph by Osman Talha Dikyar on Unsplash.
Ready to find a 3D printing service provider?
Browse 2,000+ verified providers across the United States and submit your quote request free.
Browse Providers